Cycling FTP Test: Protocols, Pacing, and Zones (2026)

You’ve probably reached the point where riding more isn’t automatically making you faster. Some days you feel strong, some days flat, and your hard sessions blur together because “hard” keeps changing. That’s usually when cyclists start looking at the cycling FTP test and realize the true value isn’t the pain cave moment itself. It’s the workflow around it.
A good FTP test gives you a usable training anchor. A bad one gives you fake precision, wrong zones, and weeks of workouts that miss the mark. The difference usually comes down to details most guides rush past: when you test, how you set up your trainer or power meter, how you pace the effort, and whether the file lands in the platform or device you use to train.
Table of Contents
- What Is FTP and Why Every Cyclist Needs It
- Choosing Your FTP Test Ramp vs 20-Minute vs 8-Minute
- Your Pre-Test Checklist Equipment Setup and Fueling
- How to Execute the Perfect FTP Test
- From Score to Structured Workouts
- Common Mistakes and Retesting Strategy
What Is FTP and Why Every Cyclist Needs It
You finish a hard workout, glance at the head unit, and wonder whether that threshold block was productive or only tiring. That is the problem FTP solves.
Functional Threshold Power, or FTP, is the highest power you can sustain for a long, hard effort without fading badly, and coaches use it to set training zones that match your current fitness. In practice, FTP gives context to every workout file, every interval target, and every pacing decision you make on the bike or trainer.
For riders who train with power, FTP is the anchor point. If that number is too high, endurance rides drift into moderate fatigue and threshold sessions become damage control. If it is too low, the work feels manageable, but the training stimulus misses the mark. An honest FTP gives you targets you can use.
That matters more than the test itself.
A good FTP number helps you do three jobs well. First, it sets zones for structured training. Second, it keeps easy days easy enough that you can recover and hit quality work later in the week. Third, it makes the rest of your workflow cleaner, from choosing the right workout in your app to saving and syncing the file back to your training platform with the right zones attached.
Here is what that looks like on the road:
- Endurance rides stay controlled: you stop riding every aerobic day a bit too hard.
- Threshold work gets specific: interval targets reflect your fitness instead of your optimism.
- Pacing improves: long climbs, time trials, and solo efforts start with restraint instead of adrenaline.
- Progress becomes easier to judge: changes in workouts and ride files mean more when they are tied to a current threshold.
Practical rule: The goal of an FTP test is not a flattering number. The goal is a useful number.
FTP also connects the physiology to real riding decisions. Threshold is the line where lactate production and clearance are close enough that you can hold a hard effort for a sustained period. For your riding, that means FTP is a strong reference for how hard you can press on a climb, in a break, or during a steady solo pull before the effort starts coming back at you.
Power alone still has limits. A bigger rider can post a strong FTP and still climb differently from a lighter rider with a lower raw number. If you care about climbing speed or race context, pair FTP with body mass and look at your power-to-weight ratio for cycling. FTP tells you the engine size. Power-to-weight tells you how that engine will feel when the road tilts up.
Treat the cycling FTP test as a calibration step for the whole training block. Get the number right, then use it everywhere it matters. In your zones, in your workout selection, and in the files you sync and review afterward.
Choosing Your FTP Test Ramp vs 20-Minute vs 8-Minute
You wake up rested, bottles filled, trainer connected, and legs good enough to test. The next decision matters more than riders expect. Pick the wrong protocol for your strengths or skill set, and you can get a number that looks clean in the app but sets poor training zones for the next block.
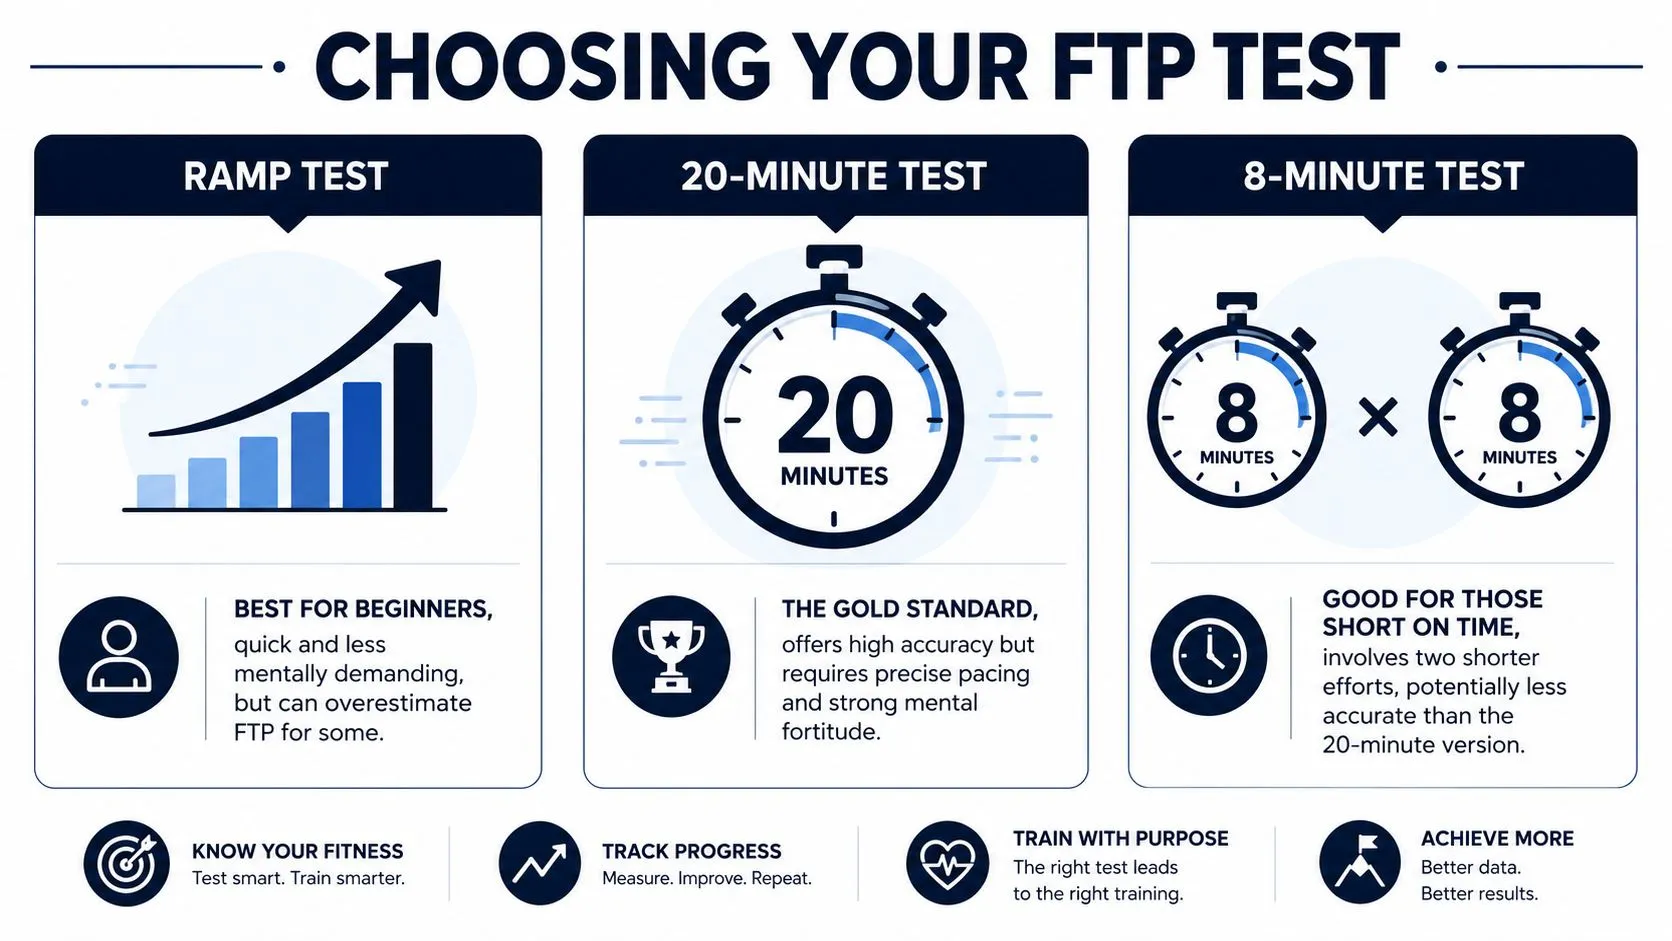
Choose the test you can pace correctly, repeat under similar conditions, and sync into your training platform without confusion. The best FTP test is the one that gives you a useful number and fits the way you train.
Quick comparison
| Test | How it works | Best for | Main trade-off |
|---|---|---|---|
| Ramp test | Resistance rises in short steps until failure, then software estimates FTP from the final completed work rate | Riders who struggle with pacing, newer power users, or anyone who wants a short, controlled test | Convenient and repeatable, but anaerobic riders sometimes test high relative to what they can hold in threshold workouts |
| 20-minute test | Ride one hard, evenly paced 20-minute effort, then estimate FTP from that average power | Experienced riders who know how threshold should feel and can hold back early | Strong match for sustained riding demands, but poor pacing can spoil the result |
| 8-minute test | Ride two hard 8-minute efforts with recovery between them, then estimate FTP from the efforts | Riders who prefer shorter efforts or mentally fade during longer tests | More approachable, but short-duration power can inflate the result for punchy riders |
The ramp test
The ramp test removes the pacing problem. That alone makes it the right starting point for a lot of cyclists.
Indoors, it also fits the full workflow well. You load the workout, follow the steps, stop when you are done, and most training apps update your FTP and zones right away. If you are still getting comfortable with structured sessions, that low-friction process helps.
The trade-off is physiological. Riders with a strong anaerobic kick can survive deeper into the final minutes and get an FTP estimate that looks better on paper than it feels in sweet spot or threshold intervals later. If your first few prescribed workouts suddenly feel one level too hard, question the estimate before you question your fitness.
The 20-minute test
The 20-minute test still does the best job of asking the exact question many road, gravel, and time trial riders care about. Can you settle in near threshold, stay controlled, and keep pressure on the pedals without drifting above your limit too early?
That makes it useful beyond the number itself. It tests pacing judgment, focus, and resistance to adrenaline. Those are race skills.
I usually steer steady riders toward this option if they already do structured interval training sessions on the bike and understand what a hard but sustainable effort feels like. The downside is simple. Go out too hard in the first five minutes, and you spend the second half defending a mistake.
The 20-minute test is usually the best benchmark for riders who care as much about pacing skill as the FTP number itself.
The 8-minute test
The 8-minute protocol sits between the other two. It feels less intimidating than a full 20-minute effort, but it still asks you to pace instead of hanging on.
That makes it a decent option for riders who freeze up before longer tests or who can produce solid repeatable efforts but lose concentration in a sustained test. Two chances also reduce the odds that one rough start ruins the whole session.
The catch is familiar to any coach who has worked with punchy riders. Shorter efforts favor athletes who can draw on high-end power. If the result gives you threshold zones that feel unrealistic in longer work, the protocol may be the issue.
How to choose without overthinking it
Use your riding profile and your training setup.
- Pick ramp if you are new to FTP testing, tend to pace badly, or want the easiest indoor workflow from test to auto-updated zones.
- Pick 20-minute if you can judge effort well and want a result that lines up closely with longer threshold workouts and race pacing.
- Pick 8-minute if you want a shorter format and you can stay controlled across both efforts.
Then stay consistent. Use the same protocol for your next retest, with the same power source and similar conditions, so changes in the file reflect changes in fitness instead of a different testing method.
Your Pre-Test Checklist Equipment Setup and Fueling
You finish the test, hit save, and realize the trainer was in ERG mode, the head unit recorded from the wrong power source, and the number you were about to build a training block around is junk. That happens more often than riders admit.
A good FTP test starts 24 hours before the first hard pedal stroke. The goal is simple: remove avoidable errors so the result reflects fitness, not fatigue, bad setup, or a broken file.
When not to test
Skip the test if your legs are still carrying a race, a hard weekend, or several nights of poor sleep. Testing in a fatigued state usually gives you an FTP that is too low, which means your next training block will be set below the workload you can handle.
That sounds harmless. It is not.
Zones that are too low make threshold work too easy, VO2 sessions too controlled, and progression harder to judge. If you want the number to guide training, test when reasonably fresh and mentally willing to suffer for the full effort.
Equipment checks that actually matter
Accuracy depends on a clean chain from power source to recording device to saved workout file. If one link fails, the test still hurts, but the result may not be usable.
Run through this before the warm-up:
- Calibrate the power source: Zero your power meter or complete the trainer spin-down your setup requires. Small errors matter more in a test than in an easy endurance ride.
- Choose the right trainer mode: For indoor testing, use resistance or slope mode so power changes come from you. ERG mode can flatten pacing decisions and distort the effort.
- Confirm the recording source: Check whether your app, head unit, or training platform is pulling power from the device you intend to use. Dual-recording is smart if you have it.
- Charge everything: Trainer, head unit, sensors, phone, laptop, earbuds if you use them.
- Control heat: Set up a strong fan, a towel, and at least one full bottle. Indoor heat drives heart rate up fast and can turn a fair test into a survival session.
- Check file sync before you start: Make sure the workout will upload to the platform where you track progress and update zones.
If you plan to turn the result straight into harder sessions, review a practical bike interval training workflow before test day so the file does not sit in your app without changing your training.
Fueling and mental setup
Treat the test like a hard race effort, not like a weigh-in. Eat a normal pre-ride meal, hydrate well, and avoid showing up half-fueled because you wanted to feel light. Under-fueled riders often mistake a nutrition problem for a fitness problem.
Keep the plan boring and repeatable. Use foods you tolerate well. Have your bottle ready. If caffeine is part of your normal routine, use it the same way you would for a key workout, not in some heroic double dose.
Mental prep matters as much. Riders get into trouble when they start the warm-up still debating the protocol, second-guessing the target cadence, or hoping motivation will fix poor planning.
Use a short pre-test checklist:
- Choose the protocol the day before.
- Set up devices and the room before the warm-up.
- Decide which power source will be the master record.
- Know your intended cadence range.
- Commit to a controlled full effort and a clean save afterward.
The test itself is only part of the workflow. Good FTP testing starts with clear legs and a stable setup, and it ends when the file syncs correctly and the number is ready to use.
How to Execute the Perfect FTP Test
The hard part starts once the countdown hits zero. A good FTP test is a controlled effort from the first pedal stroke to the moment you save the file. Riders who rush the opening, chase every power fluctuation, or forget to sync the workout usually end up with a number they cannot trust or use.
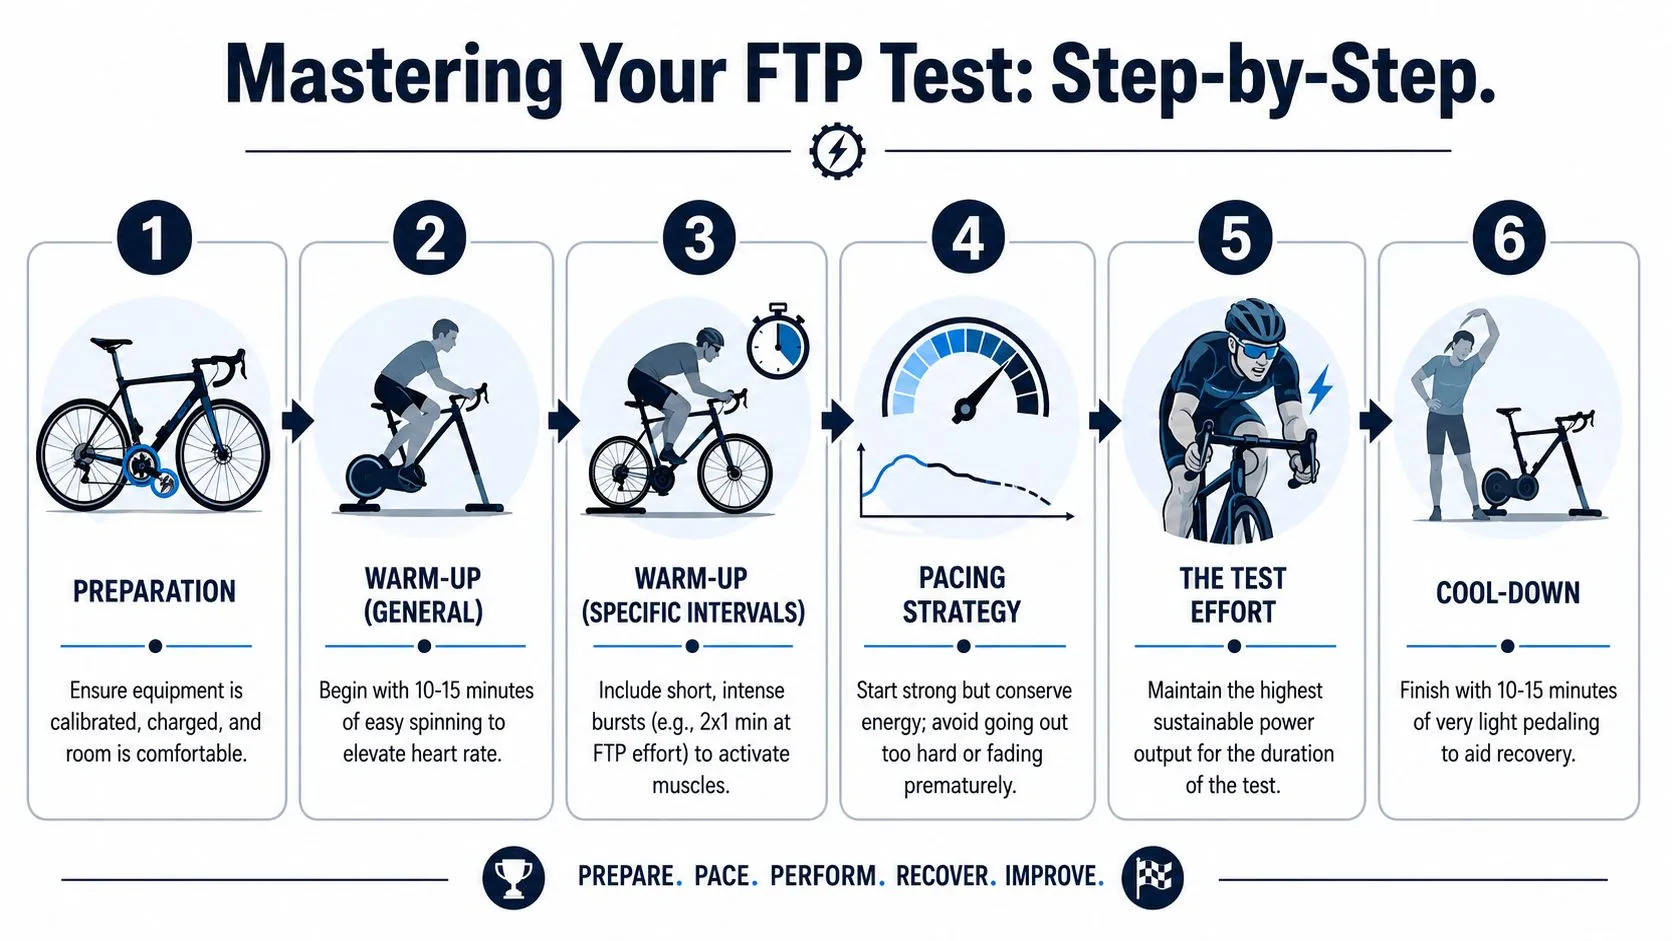
Warm up like you plan to perform
A proper warm-up raises heart rate, opens up breathing, and gets the legs ready to produce steady power. If you skip that process, the first few minutes of the test become part warm-up and part test, which usually leads to pacing errors and a lower result.
Keep it simple and repeatable:
- Start easy: build from light spinning to a steady aerobic effort.
- Add a few short efforts: enough to wake up the legs and make threshold work feel familiar.
- Settle down before the start: breathing should be engaged, but you should still feel in control.
Match your normal riding cadence during the warm-up. The point is to arrive at the start feeling ready, not scattered.
Pace the effort so the result is usable
The 20-minute test rewards restraint. Riders who go out too hard often spend the back half trying to survive instead of showing true threshold. What works best on the bike is a slight negative split. Start a touch under what you hope to hold, settle into rhythm, then press once you know the effort is sustainable.
Use simple checkpoints:
- First five minutes: controlled and patient.
- Middle ten minutes: steady pressure, no surges.
- Last five minutes: increase only if you still have room to give more.
For a ramp test, pacing is less tactical, but execution still matters. Hold form, keep pedaling smoothly, and resist the urge to grind a huge gear as the steps get harder. Once cadence collapses and upper-body movement takes over, the test is nearly done.
Keep cadence stable and posture quiet
Cadence is not a side detail. It changes how the effort feels and how clean the result is. For most riders, a natural cadence in the moderate-to-high range works better than forcing an exaggerated spin or dropping into a slow grind.
On screen, watch for drift. If cadence falls every minute, power starts jumping, and you are shifting constantly, something is off. Usually it is pacing, gearing, or resistance mode.
Here is the practical target:
- Ride close to your normal training cadence
- Avoid late-test grinding unless that is how you normally ride
- Keep your upper body calm and your pedal stroke even
- Use lap power or average power, not second-by-second noise, to judge the effort
If you want the number to feed training correctly afterward, run it through an FTP training zone calculator for cycling workouts once the test is saved and synced.
This video gives a good visual on how riders approach the effort:
Finish the test properly
The test is not over when you stop pedaling hard. Cool down long enough to get breathing under control, then save the ride and confirm it synced to the platform you use for workouts. I have seen riders nail the effort, forget to upload the file, and end up guessing at zones later from a half-missing record.
Clean execution looks boring on the graph. Power stays controlled, cadence stays close to normal, and the effort gets harder in a straight line instead of turning into repeated attacks. That is what gives you a result you can build training around.
From Score to Structured Workouts
You finish the test, see a new FTP, and feel done. The useful part starts after that.

A test result only improves training if the math is correct, the zones are updated, and the file lands in the platform that runs your workouts. Miss one step and the number sits there like trivia.
Calculate the number correctly
Use the formula that matches the test you rode. A 20-minute test is typically estimated at 95% of your average power for the effort. An 8-minute test uses a lower multiplier. A ramp test is derived from the final stage you complete, not from your average power for the whole ride.
One example makes this concrete. If your 20-minute average power was 200 watts, your working FTP would be 190 watts.
Then store it where it matters. Update your training app, head unit, smart trainer platform, or workout builder. If one device still has the old FTP, interval targets drift, workout compliance gets messy, and trend data becomes harder to trust.
Turn the result into training decisions
FTP matters because it gives each session a job.
Recovery rides stay easy. Endurance work stops creeping too hard. Tempo and sweet spot sessions become repeatable instead of guesswork. Threshold intervals hit the intended strain without turning every set into survival mode.
That is what this means for your ride. You stop asking, “How hard should today feel?” and start riding to a target that matches your current fitness. If you want clean zone ranges before building the next block, run the number through an FTP zone calculator for cycling workouts.
Do not treat the FTP score as a badge. Treat it as a setting.
Finish the workflow by saving and syncing the file
This part is boring, and it is where plenty of riders create avoidable problems. The test file needs to be saved, synced, labeled, and applied to the devices and apps you use next week, not only the one you used today.
A post-test workflow that holds up looks like this:
- Save the activity right away: confirm the file uploaded completely.
- Label the ride clearly: note the protocol, bike, trainer or power meter, and anything unusual like heat, poor sleep, or a cadence issue.
- Update FTP everywhere it matters: your training platform, head unit, and any app that sets workout targets.
- Check the next scheduled workout: make sure interval wattages changed to match the new number.
I also recommend keeping your test notes in the same place every time. That makes retests much easier to compare. If the number jumps or drops, you can quickly see whether fitness changed, equipment changed, or the setup changed. Consistency across testing, calculation, and sync is what turns one hard ride into training you can trust.
Common Mistakes and Retesting Strategy
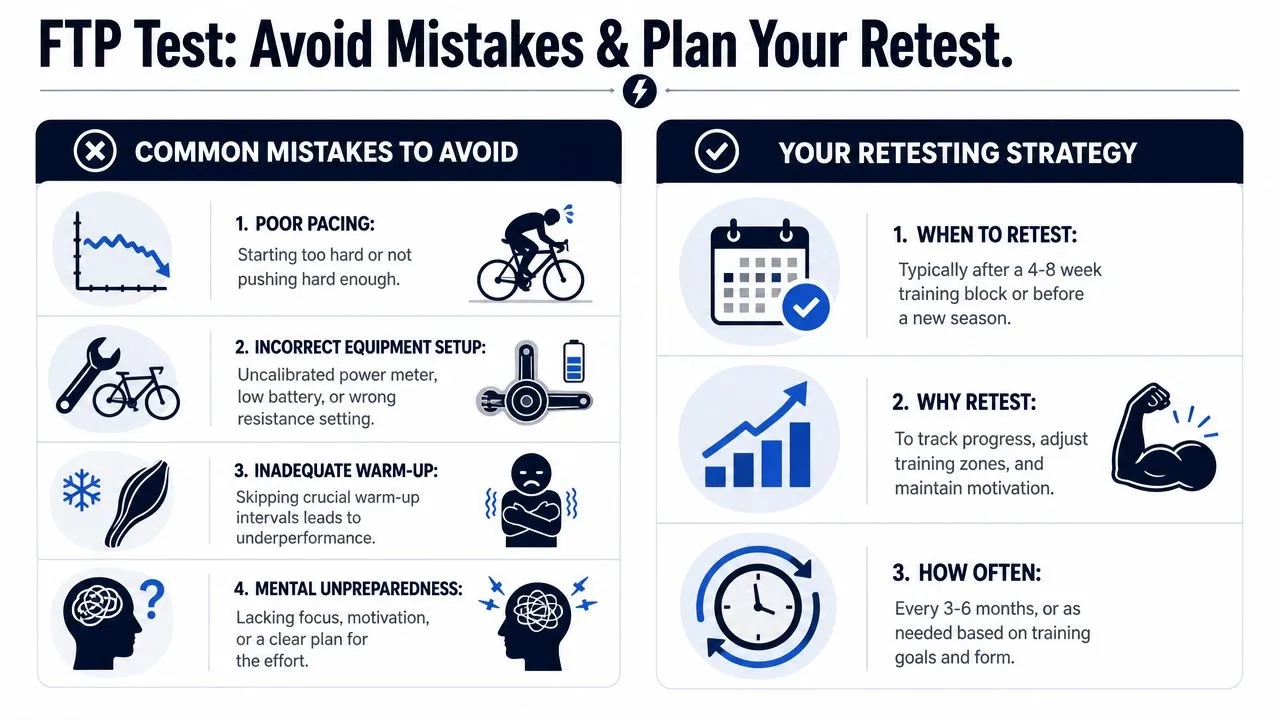
A bad FTP test usually starts before the first hard minute. The rider is carrying fatigue, the trainer was not calibrated, ERG mode is still on, breakfast was light, and the opening effort goes out too hard. The final number looks precise, but the workout targets for the next block are off.
That creates a practical problem on the bike. Sweet spot feels like threshold, threshold turns into survival work, and recovery between sessions gets worse for reasons that seem mysterious until you trace them back to test day.
The mistakes are predictable:
- Testing with residual fatigue: do the test after easier days, not at the tail end of a hard block.
- Skipping equipment checks: calibrate the trainer or power meter and confirm the recording device is reading the correct source.
- Using the wrong mode: for most riders, standard resistance or slope mode works better than ERG during the test because pacing stays in your hands.
- Rushing the start: the first few minutes should feel controlled, especially in a 20-minute protocol.
- Letting form collapse: if cadence, posture, and breathing fall apart early, the result is measuring a pacing error as much as fitness.
Retesting works best on a schedule, not on emotion. A consistent cycle after a solid training block gives you numbers you can compare with confidence. If training has been interrupted by illness, travel, races, or equipment changes, wait until conditions are normal again. A rushed retest adds noise, not insight.
I like a simple rule. Retest when your current zones no longer match the work you are able to do, or when you have completed enough structured training that adaptation is likely to be real. One bad workout is not a reason to test. One strong group ride is not a reason either.
The final step is easy to overlook and it matters. Once you retest, save the file, label it clearly, and update the FTP setting everywhere you train. If the new number only lives in one app, the rest of your workflow stays wrong.
Once the number is set, the next job is getting workouts built from it onto your device. Type the session into TextFit: “3 x 10 min at FTP with 5 min easy”, in any language. You get a structured workout to review and tweak, then it syncs to Garmin and Wahoo through intervals.icu or schedules on your Apple Watch. It’s free to start, and there’s no sign-up.